Creating Message Classes
The Connector you develop using the Messaging Framework must be able to parse the messages received from the sending API. To parse the message, the Connector must understand the data structure for each message object. The easiest way to modify the project to parse messages is to use a sample message from the sending API and paste it as a class into the Item.cs file as follows:
- In Visual Studio, open your Connector project
- In the Solution Explorer, open the Models node. The Wizard has created a class called item.cs, which is the template for the message to be processed.

- Here you will update the following section:
public class Item
{public string Name { get; set; }
}
-
Copy the event message provided by the sending API. For the Stripe Sample Connector copy the sample message in Stripe Message Sample.
- In Visual Studio, highlight everything inside the outermost set of brackets after namespace in item.cs.
- Select Edit > Paste Special > Paste JSON as Classes. The message generated by the API is converted to a class file and looks similar to the following:
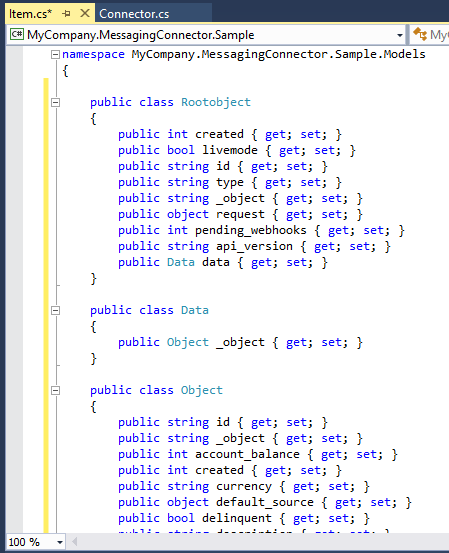
- Visual Studio has done much of the work for you. If you see anything wrong in the data types, you can update them. While there is nothing actually wrong, there is a clearer way to show the entity. In this example instead of the Entity being named Object, change it to Customer.

- Next go back to the connector.cs to and modify the code there to reflect the change made in item.cs
- Next go back to the connector.cs to and modify the code there to reflect the change made in item.cs.
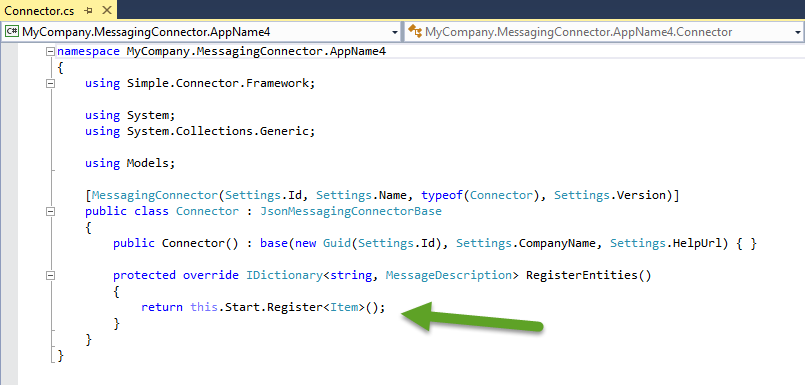
- In the Connector class, change this:
return this.Start.Register<Item>To this:
return this.Start.Register<Rootobject, Customer>(ro => ro.data._object); - Save the changes to the connector.cs and item.cs files.
See